Wildcard domain won’t cover wildcard subdomains. E.g. you’d have to register *.app.domain.comtogether with *.domain.com
After registering, you will have 3 different files ca_bundle.crt, certificate.crt, private.key. Usually you’d have to combine ca_bundle.crt with certificate.crt to make a single file. When concatenating them, the order doesn’t really matter, you just need to bring the entire file from one to another.
Free SSL is not a silver bullet for every use cases. For instance, you won’t be able to use it with your custom domain on WordPress or Heroku. Usually, free SSL would help if you have control of the web servers or platforms.
Recently, I have to do some data analysis for my own project, and data size (compressed) is about 40Gb. What does that mean?
I used to do analysis tasks at work. But this time I cannot use company’s infrastructure (Hadoop, Yarn, Spark, …), this is personal matter.
I have Jupyter notebook on my poor local machine, however, the data size is not small enough to run on this little guy who always have about 100Mb memory free.
I wanted to use PySpark DataFrame instead of Pandas DataFrame because I’m more familiar with PySpark’s API and documentation.
Assumptions:
You have a fresh Ubuntu 16.04 (Xenial Xerus): To be clear, it doesn’t have to be fresh, and doesn’t have to be Ubuntu 16.04. But having a clean one with exact version/distribution will make your life easier to install and debug. Believe me, messing with an existing server with bunch of installed packages with different version will drive you crazy, easily to steal couple of days from you.
The server has a public IP address, let’s say it is 11.22.33.44: Note, if you tend to run it locally, then this is unnecessary. Local IP or even localhost would be more than enough.
The server’s firewall rule must opens at least 2 ports 8888 and 18080: Similar as above, if this is local environment, then you can completely ignore this.
Installation
Swap Space
For this tutorial, I used AWS EC2 Free tier, this instance has only 1Gb of memory, not enough to handle heavy system like Spark. Besides, having swap space for backing-up RAM is a good solution when memory is fully occupied for any reasons.
In this case I used only 2Gb of SSD to make swap space (out of 30Gb of free EC2). Feel free to change it if you want more.
sudo dd if=/dev/zero of=/var/swapfile bs=1M count=2048
sudo chmod 600 /var/swapfile
sudo mkswap /var/swapfile
echo /var/swapfile none swap defaults 0 0 | sudo tee -a /etc/fstab
sudo swapon -a
Prerequisite packages
There are some utility packages we’d need for later, so let’s install it now:
unzip: Uncompression
python-pip: Python and Python package manager (2.7.12)
Spark use SBT (together with Maven) as package management and build tool.
echo "deb https://dl.bintray.com/sbt/debian /" | sudo tee -a /etc/apt/sources.list.d/sbt.list
sudo apt-key adv --keyserver hkp://keyserver.ubuntu.com:80 --recv 2EE0EA64E40A89B84B2DF73499E82A75642AC823
sudo apt-get update
sudo apt-get install sbt

sbt about # to verify
Spark
We’re going to build Spark from code. Well, it doesn’t sound scary as it seems. It’s Scala (Java) code base in general, so building from source code is far easier and stable than from C source code (which is heavily rely on operation systems and distributions).
The build process sbt package will take some time (about 30-45 mins). So feel free to grab a coffee, relax and go back instead of staring at the console.
git clone https://github.com/apache/spark.git
cd ~/spark
git checkout v2.1.1
sbt package # this guy takes time
After having binaries and packages built, let’s add them to our current path. Remember
tee -a ~/.bash_aliases <<EOF
export PATH=\$PATH:/home/ubuntu/spark/sbin:/home/ubuntu/spark/bin
export SPARK_HOME=/home/ubuntu/spark/
EOF
source ~/.bashrc

pyspark --version # to verify
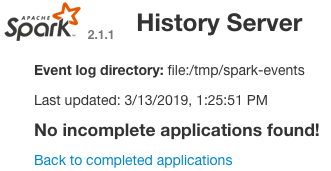
Spark History Server
This server needs a place to keep the events. By default the directory is /tmp/spark-events. So, let’s make one and start it.
You now can access to Spark History Server at http://11.22.33.44:18080/ and have something like this
Jupyter
It’s time to install Jupyter, our super power analyzing tools.
sudo python -m pip install --upgrade pip
sudo python -m pip install jupyter

jupyter notebook list # to verify
And we need to connect it to PySpark. In order to not messing up with Spark, PySpark (which I have seen plenty of times), we create a different shell script to start Jupyter and use it as the “contact point” to trigger Jupyter server later.
From now on, all you need to start your Jupyter is run this bash jupyter.sh, and you will be able to access it at http://11.22.33.44:8888/. But how can you verify if your Jupyter is connected to Spark? Use this sc.applicationId to test it, you will see something like this:
Also, look back to your Spark History Server, the application ID should match perfectly.
Bonus
This is absolutely optional, but it would be cool to have a domain or subdomain to access to Jupyter and Spark History Server instead of IP address. In this case I use Nginx proxy reverse engine. Assuming you have configure your DNS to have these subdomains jupyter.domain.com and sparkui.domain.com point to your server 11.22.33.44.